Horizontal Layout Container Component (HBox)
HBox is essentially a container-type component, and like all container components, it inherits from Box.
It is commonly used for horizontal layout and provides more refined features compared to a standard Box.
For detailed property definitions, refer to the API documentation.
1. Creating an HBox in LayaAir IDE
1.1 Creating an HBox
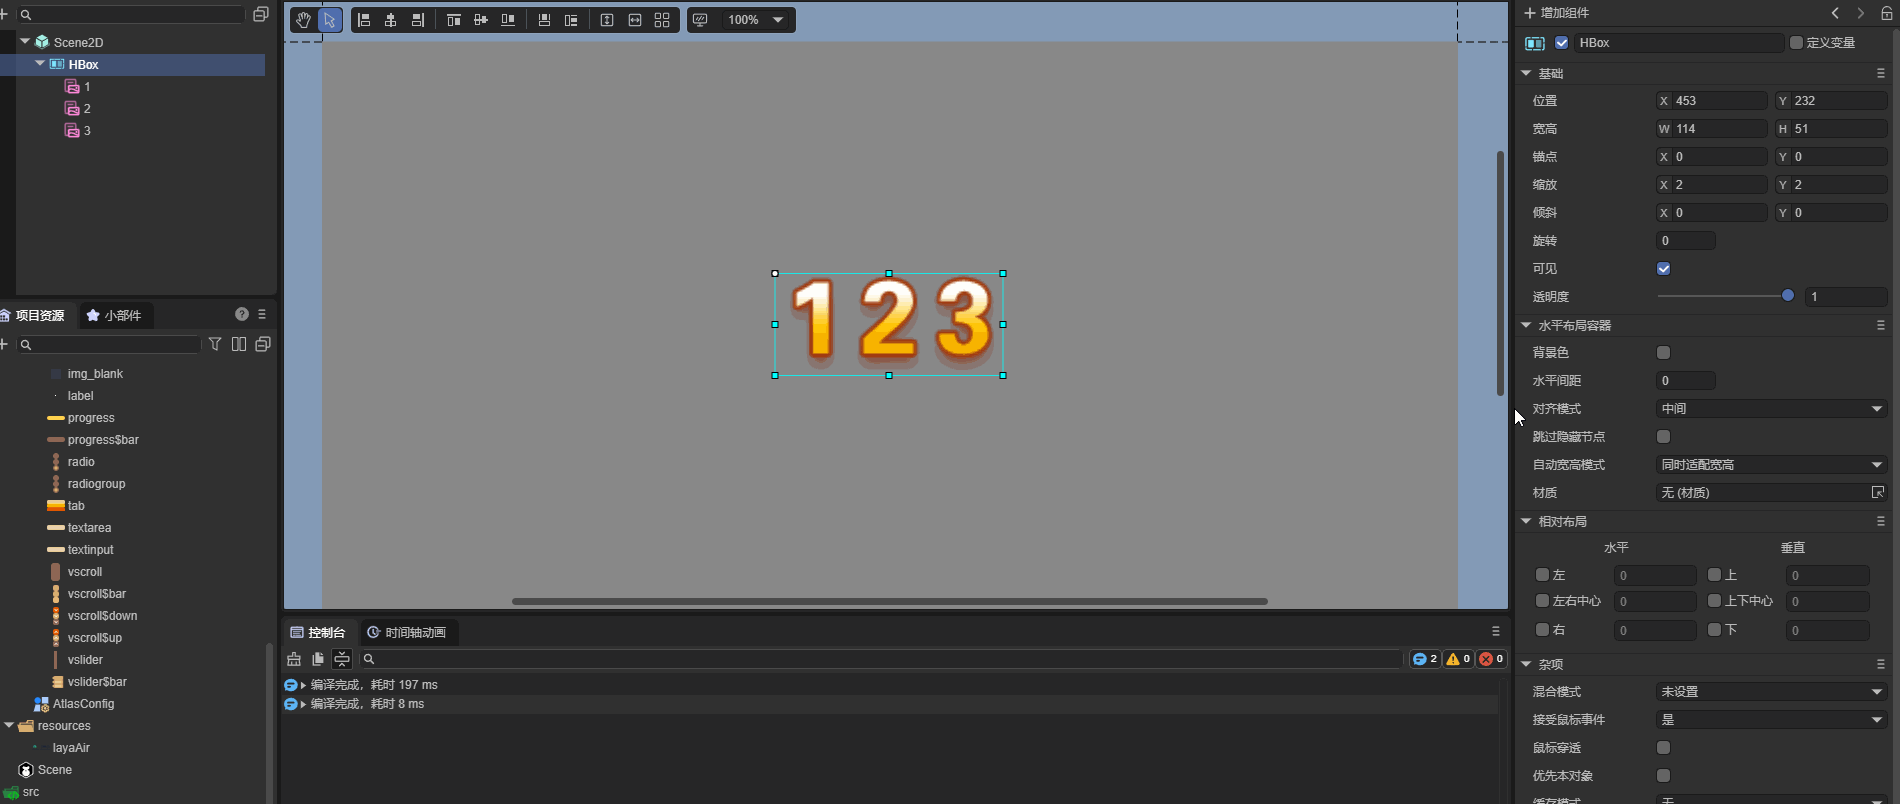
You can visually create an HBox directly in the Hierarchy Panel of the IDE, as shown in Figure 1-1. Right-click in the Hierarchy window to create one, or drag it in from the Widgets panel.
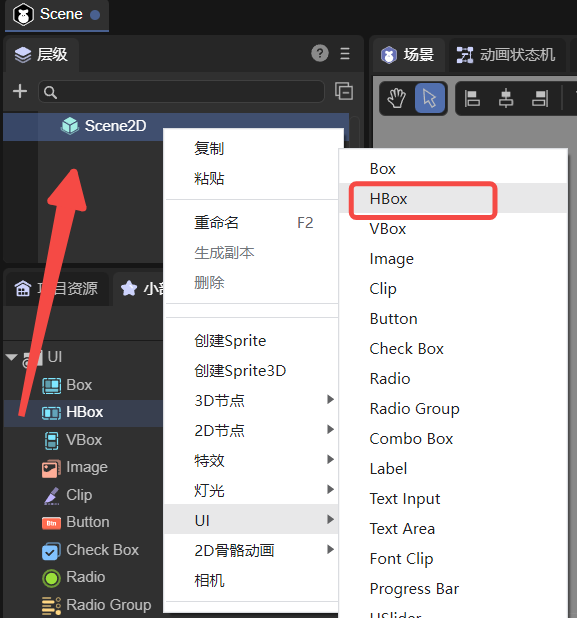
(Figure 1-1)
1.2 HBox Properties
The unique properties of the HBox component are shown below:
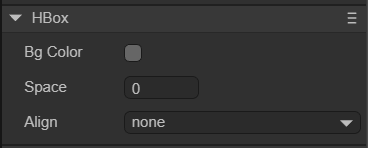
(Figure 1-2)
| Property | Description |
|---|---|
| bgColor | Background color. You can input a color value such as #ffffff, or select one using the color picker. |
| space | The horizontal spacing between child objects, in pixels. |
| align | Vertical alignment mode for layout elements. Options are: • none – no vertical alignment• top – align to top• middle – align to center vertically• bottom – align to bottomDefault is none. |
| skipHidden | Defaults to false. When enabled, hidden nodes are automatically skipped during layout. |
| autoSizeMode | Automatically adjusts width and/or height. Options: • none – no auto-sizing• both – auto width and height• width – auto width only |
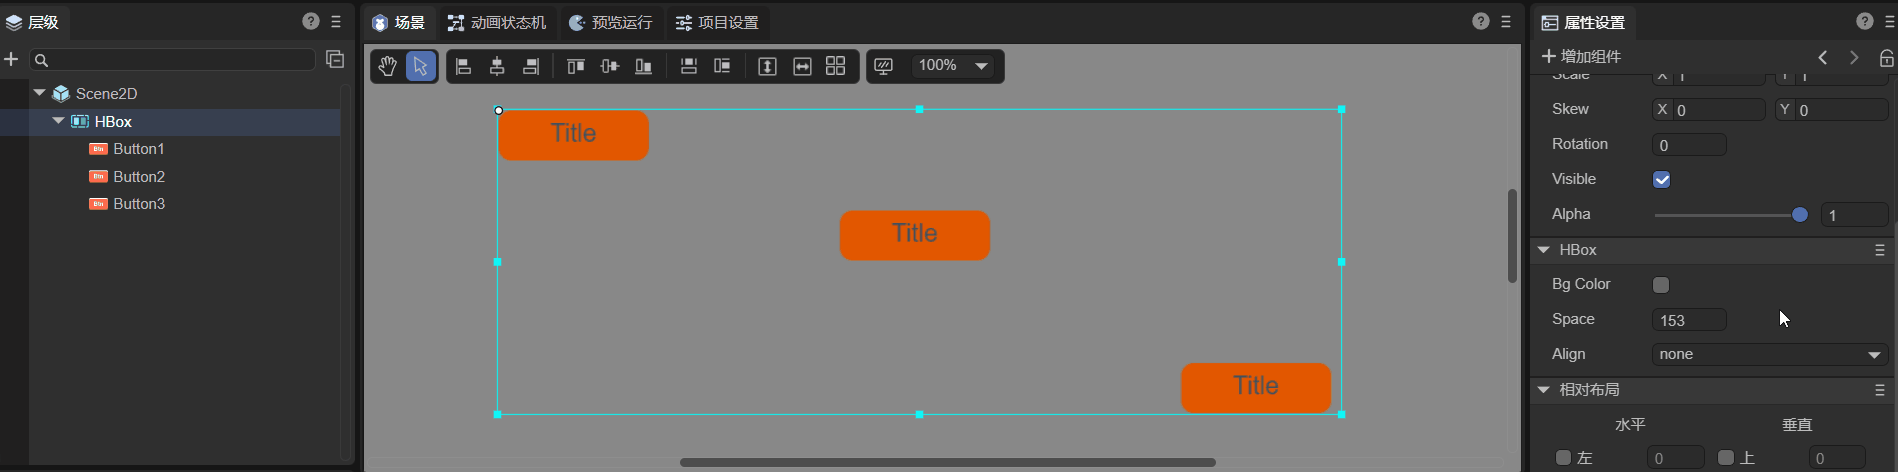
The space property defines the horizontal gap between child elements (in pixels).
You can enter a number directly or drag with the mouse to adjust it.
Assume an HBox contains three Button components — adjusting the space property produces the effect shown in Animation 1-3:
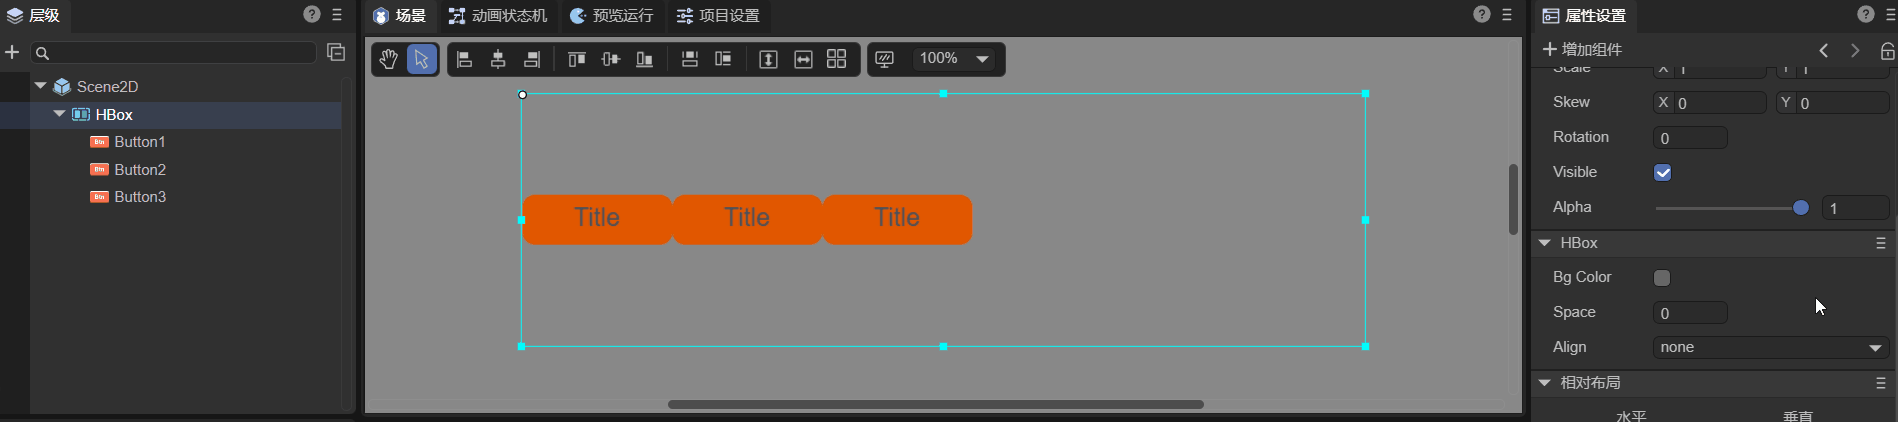
(Animation 1-3)
Regardless of how child nodes are positioned in the IDE, once the align property is set, they will automatically align vertically according to that setting (Animation 1-4):
(Animation 1-4)
If Skip Hidden Nodes is unchecked, the layout leaves an empty space for hidden elements (Animation 1-5).
In this example, the “2” bitmap font’s disabled property is set to true, so an empty slot appears:

(Animation 1-5)
When Skip Hidden Nodes is enabled, hidden items are ignored during layout (Animation 1-6). Here, the same “2” element is disabled, but no gap appears:
(Animation 1-6)
Auto-size modes mainly include width & height auto-fit and height-only auto-fit, as shown in Figure 1-7:
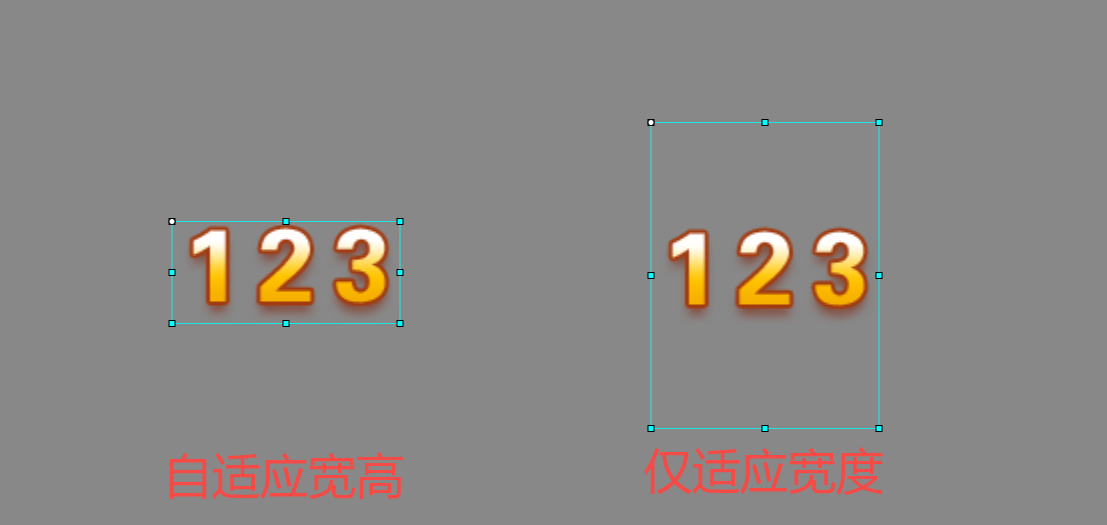
(Figure 1-7)
1.3 Controlling HBox with Script
In the Scene2D properties panel, add a custom script component. Then, drag the HBox into the exposed property field. For demonstration purposes, add some child nodes under the HBox. Example script:
const { regClass, property } = Laya;

@regClass()
export class NewScript extends Laya.Script {

    @property({ type: Laya.HBox })
    public hbox: Laya.HBox;

    // Called once when the component is activated
    onAwake(): void {
        this.hbox.pos(100, 100);
        this.hbox.bgColor = "#ffffff";
        this.hbox.space = 100;
        this.hbox.align = "middle";
    }
}
2. Creating an HBox via Code
Sometimes you may need to create UI elements dynamically through code.
The following example creates an UI_HBox class that constructs an HBox with three Button components for demonstration.
const { regClass, property } = Laya;

@regClass()
export class UI_HBox extends Laya.Script {

    private hbox: Laya.HBox;
    private btn1: Laya.Button;
    private btn2: Laya.Button;
    private btn3: Laya.Button;

    // Button skin resource
    private skins: string = "atlas/comp/button.png";

    // Called once when the component is activated
    onAwake(): void {
        Laya.loader.load(this.skins).then(() => {
            this.createBtn();
            this.createHbox();
            // Add HBox component to the scene
            this.owner.addChild(this.hbox);
        });
    }

    // Create Button components
    private createBtn(): void {
        this.btn1 = new Laya.Button(this.skins);
        this.btn2 = new Laya.Button(this.skins);
        this.btn3 = new Laya.Button(this.skins);
    }

    // Create HBox component
    private createHbox(): void {
        this.hbox = new Laya.HBox();
        this.hbox.pos(100, 100);
        this.hbox.size(600, 300);
        this.hbox.bgColor = "#ffffff";
        this.hbox.addChild(this.btn1);
        this.hbox.addChild(this.btn2);
        this.hbox.addChild(this.btn3);
        this.hbox.space = 100;
        this.hbox.align = "middle";
    }
}
This example demonstrates how to programmatically generate an HBox container, add buttons as children, and apply layout configurations dynamically.